
As a generational and family player, I’m obsessed with taking beautiful family photos to display on the walls of my Sims’ homes. Weddings, graduations, first days of school, birthday parties, family vacations, it’s all captured in photo memories that make a house feel like a home. I’m always using the in-game camera tools to get the perfect shots of my Sims. A friend of mine asked me for a photography tutorial to help her learn the ins and outs of taking photographs in the game. I was all too happy to share my process!
So today, I’ll be walking you through how to take beautiful in-game photos that your Sims can hang up on the wall or display on surfaces. First, I’ll show you how to take photos with just the base game. Then I’ll introduce you to how you can enhance your photography using the Moschino Stuff pack! Lastly, I’ll point you to some optional mods that I find helpful for taking and organizing my photos.
Getting the Equipment
To start taking photos, your Sims will need either their cell phone or any camera found in Build/Buy. All the cameras are located in the Activities & Skills > Creativity category. There are three base game cameras you can purchase. The cheapest one isn’t any better than the cell phone for taking pictures; it only lets you take small photos and doesn’t have zoom capabilities. The mid-range camera allows you to take small and medium photos and does have zoom capabilities. The expensive camera takes small, medium, and large photos and has even better zoom capabilities.


On the cell phone, your photo options will be under the Entertainment tab. It’s the icon of a stereo speaker on the bottom far right of the phone menu. On the cameras from Build/Buy, you’ll have to drag them into a Sim’s inventory before any photo options will come up on them. In a Sim’s inventory, click on the camera to bring up photo options.
- Take Selfie: This will allow your Sim to snap a picture of themselves! This option is only available on the cell phone.
- Take Photo: This will let your Sim take a photo of anything from wherever they’re standing. This option is good for taking shots of landscapes, objects, or capturing candid moments between Sims.
- Take Photo Of: This option lets you take nice posed portrait shots of other Sims.
- Take Photo With: This will let your Sims take a picture of themselves with another Sim. Great for cute couple shots or best friend pictures!
- Simstagram Pet: This option will only be available if you own the Cats & Dogs expansion pack. Your Sims can take photos of their pets to upload to Simstagram.
Getting the Perfect Shot
When you take a picture using the camera, there are several tools and options available to you. Not all options will be available on all cameras but below is an example picture of what the in-game photography screen looks like with the most expensive digital camera.

- Filters: Click on the filters tab in the top left to bring up 11 different filters for your shots. If your Sim does not have high photography skill, choose your filter carefully; poor quality photos cannot have their filters changed afterwards.
- Poses: This option is only available for players who own the Moschino Stuff pack and only appears when using the Take Picture Of option. Click through the bottom left tab to switch between different poses. There are eight different categories of emotions with a few poses to cycle through in each category. You can also click the group icon at the top of the pose tab to cycle through all the different pose categories.
- Sizing: In the bottom bar on the left, you’ll see three rectangles in different sizes. This is where you can select the size of your photo. The cell phone and cheapest camera only allow you to take small photos. The mid-range camera allows you to take small and medium sized photos. The expensive camera has small, medium, and large photo sizing options.
- Orientation: In the bottom centre tab on the left, the circular icon is your orientation. Click this to switch between landscape and portrait shots.
- Take Photo: The camera icon in the centre is how you snap your pictures. You can take up to 5 pictures at once so don’t worry too much if you’re not 100% sure about your first few takes. If your Sim has low Photography skill, it’s always best to take all five shots, even if it’s all of the exact same picture. There’s a chance some of your photos might turn out blurry or with a gnome in it so it’s best to take as many shots as possible to ensure at least one looks okay.
- Flash: I don’t use this option too much but it is available if you need it. It’s next to the camera icon on the right side of the bottom centre tab and it just turns the flash setting on and off. Turn this on when taking photos at night or in dim lighting. Turn it off for daytime photos in bright lighting.
- Pan and Tilt: The directional arrows in the bottom right corner allow you to pan and tilt the camera around. I don’t like to use these; I find them clunky and hard to manage. I prefer to use the keyboard keys and mouse to have better control over my shots, but more on that later. For now, just know it’s there if you want to use it.
- Zoom: On the right hand side is the zoom function. The cell phone and cheapest camera will not have zoom capabilities but the mid-range and expensive cameras will. Unlike the Pan and Pitch option, I actually prefer to use this slider bar rather than my keyboard and mouse. I can zoom in and out more precisely when using the slider.
- X: The little X in the top right corner just exits out of the photography menu in case you change your mind or decide you’re done taking pictures before you’ve used up your five shots.
When you’re happy with all your settings, take your picture! The photos will be added to the photographer Sim’s inventory as well as to your Screenshots folder in Documents > Electronic Arts > The Sims 4. The photos can then be framed and displayed on a wall or surface to decorate your Sims’ homes.
Get Greater Control Over Your Shots
Like I mentioned, if you’re a PC player, you can make it easier on yourself to control the camera by using your keyboard and mouse.
- Q + E Keys: Tilt the camera up or down.
- A + D Keys: Pan the camera left and right.
- Mouse Scroll Wheel or Z + X Keys: Zoom in and out.
- Left Click + Drag: Freely move the camera in any direction.
- C Key: Snap Picture
Personally, I pretty much only use the Left Click + Drag feature on the mouse to move the camera around. It gives me so much more freedom to get the exact angle I want. For Zoom, I do prefer the slider on-screen, however.
What To Do With Your Photos

Once you have some photos in your Sim’s inventory, drag them onto a wall or surface to display them! Photos have lots of different options available on them and the more packs you own, the more options you’ll have.
- Add/Remove Frame: You can put a frame on your photos. There are eight different colours to choose from.
- Update Frame: If you want to change the colour of your frame, you can do so with this option.
- Rotate Photo: I find this option pretty useless, personally. All it does is switch the orientation between landscape and portrait. The result always looks wonky but hey, it’s there, I guess.
- Set Filter: This option is not available on poor quality photos; you’re stuck with whatever filter you picked when you took your shot, but nicer quality photos can have their filter changed anytime.
- View: Your Sim will admire the photo. Nothing really exciting about it but they may get a positive moodlet if it’s a good photo.
- Create Copy: You can make copies of your photos to sell or gift to other Sims but it does cost some simoleons to do so.
- List on Plopsy: This is only available with the Nifty Knitting Stuff Pack. Sims can list their photos for sale on the online marketplace, Plopsy. It costs a few simoleons to list a photo for sale.
- Upload to Simstagram: This is only available with the Get Famous expansion pack. Sims can post their photos to Simstagram for fame.
- Sell to Publication: This is only available with the Get Famous expansion pack. Sims can sell their photos to magazines for both fame and simoleons.
Other Tips for Taking Great Photos
- Lighting is important! It’s best to take shots outside during the day in sunny weather but if you are taking indoor shots, make sure the room is well-lit to get the most clear and colourful pictures.
- If you don’t own Moschino Stuff, you won’t be able to customize your poses when taking pictures of other Sims. They’ll pose according to their emotional state. So make sure your photo subjects are in a good mood if you don’t want sad, mopey, or bored-looking portrait shots.
- Without Moschino Stuff, you cannot pitch the camera lower or higher. All photos will be taken at the height of the photographer Sim; you can only tilt the camera upwards or downwards from that starting height. A way to get around this is by using children as your photographer. If you’re taking a picture of a toddler or child and you want the camera closer to their height, have a child take the picture. Kids are short and will therefore take pictures from a lower vantage point.
- Make use of the classic photography rule; The Rule of Thirds. There’s a lot to learn about this rule but for beginner photographers, all you really need to know is this; most of the time, your photo will look better when your subject is not dead centre of your shot. Photos usually look more pleasing to the eye when your subject is centred at the point where the grid lines meet. In my labeled diagram above, you can see I’ve centred the Sim’s nose on one of these points. The Rule of Thirds doesn’t always work so use your own judgement when taking your pictures but it’s a good rule of thumb for beginners to get a feel for photo layout.
- Backgrounds really make a difference. Make sure your photos have a nice scenic background or a solid colour background. Dirty plates, trash, or a cluttered area that looks very busy will distract from your photo subject and ruin an otherwise lovely shot.
Enhance Your Photography Game with Moschino Stuff
Players who own the Moschino Stuff pack will find they have a much wider range of photography options available to them. Moschino Stuff is one of my favourite stuff packs because it gives me almost unlimited control over my photos and offers so many different options for getting the perfect shot and displaying my photos.
First, let’s check out all the photography-related stuff that comes with this stuff pack:


- Fashion Studio Photography Tripod: This is your bread and butter when taking photos. The tripod can be equipped with any camera and put in your Sim’s inventory to be taken anywhere in the world you want to take a beautiful photo, even off of a lot! Not only that but the tripod makes any amateur photographer a professional; no matter the skill of the photographer or how cheap the camera, the tripod opens up all advanced photography options and takes Outstanding quality photos every time! You also have the freedom to pitch the camera to low or high angles to get more dramatic, cinematic shots. It’s just all-around more powerful and versatile than using a camera by itself. It also comes with extra photo options which I’ll go over in more detail soon.
- Fashion Studio Subject Mark: These are incredibly useful for making your photo subjects stand exactly where you want them. I highly recommend using these when taking photos with pets and toddlers; for some reason, the Sims like to pose off to the side instead of directly in front of the tripod when taking pet and toddler photos. Using the subject mark stops that. They can placed in the world off a lot, too, so it helps make Sims stand where you want off of a lot.
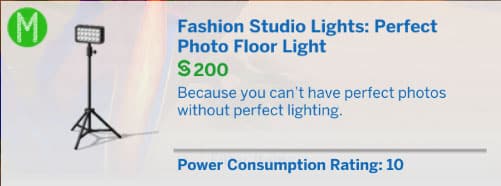
- Fashion Studio Lights: You can technically use any lighting you prefer in the game to light up your scenes the way you want them but these are specifically designed for studio lighting so they’re my go-to for taking pictures. They’re also live draggable so it’s a lot easier to drag them around quickly in Live Mode when I’m doing long photoshoots. Don’t forget to adjust the colour and brightness for just the right mood lighting!
- Photo Drape & Backdrops: These are awesome for a quick backdrop in a pinch! The photo drape comes in several colours and patterns and is very useful for nice, clean portrait shots. The only downside is that you have to go into Build/Buy to change the colour of it all the time. The curved and straight digital backdrops are my preferred backdrops. They can be connected for impressive wraparound backgrounds and you can select multiple different animated backgrounds in Live Mode. My personal favourite is the cityscape backdrop.
- MixPix Digital Photo Frames: I love love LOVE these so much! They save a tonne of space on my Sims’ walls. I take literally hundreds of family photos and always run out of wall space so fast. Just drop all the photos you want into these frames’ shared inventory and they’ll cycle through all of your photos on a time schedule you can customise.
- Collage Photo Frame: This collage frame lets you display three photos in a single frame. I love to use these to document my Sims’ kids as they age. Each child gets their own frame when they’re born and as they grow, their toddler, child, and teen portraits get added to them. Another great space saver! The collage frames only take small sized photos for the two left slots and medium sized photos for the right slot. Make sure they’re the right orientation, too, or they’ll look strange in the frame.
- ClickShoot P10 Mirrorless Camera: This camera is a high end camera that you unlock via the freelance Fashion Photographer career that Moschino Stuff added. I don’t use it too often because I don’t play the Fashion Photographer career a lot but it is a very impressive, powerful professional camera.
Most of these items are self-explanatory to use but the tripod and subject mark do have some options that are worth breaking down.
In addition to all the same options available on the Crystal Clear Digital Camera, the Moschino Tripod also has a few other options and functions:

- Take Picture Carrying: This option allows you to take adorable pictures of a teen or older Sim holding a toddler. There are a few different poses they do together and they’re all very heartwarming. I recommend making sure both the older Sim and the toddler are very close to where you’re taking the picture because toddlers are slow. If the adult has to walk a long distance to go get them and carry them back, the action can cancel itself on you.
- Take Picture of Sim with Pet: This option is only available if you own the Cats & Dogs expansion pack. It allows you to take pictures of a Sim with your pets! Sims will hold cats and small dogs. They will pose low to the ground with big dogs. Again, all the poses are adorable.
- Take Picture of Sim on Subject Mark: This option will be greyed out if you don’t have a subject mark placed down near the tripod with a Sim already standing on it. Click the subject mark to direct a Sim to stand there and wait for a photographer, then have your photographer Sim use this option on the tripod to take their picture.
- Take Picture With: This is the same function as the other cameras, except the tripod has a timer so your photographer Sim will set the timer on the tripod and go pose with the other Sims.
- Q + E Keys: This will actually pitch the camera up and down properly when taking pictures with the tripod, unlike just using the cameras by themselves, which will tilt the camera up or down from the same starting height.
- Rotate Photographer: There will be an extra slider along the bottom when taking photos with the tripod. This will actually rotate your photographer around a full 360 degrees. This is helpful for when your Sim has placed down the tripod in the wrong direction off of a lot when you can’t easily just swivel the tripod around.

The Subject Mark that can be used with the tripod has a few different options as well:
- Wait for Photographer: This is the option you should pick to have your Sim stand on the subject mark to get their picture taken.
- Hire a Fashion Subject: This is useful for professional photographers who want to use different models for their photoshoots. It costs 100 simoleons to hire a fashion subject and a Sim will show up on the lot to be photographed.
- Ask to Pose: You can have your photographer Sim direct a specific Sim to stand on the subject mark.
In addition to all the new photography options, Moschino Stuff also adds a whole new freelance career for your Sims to make a living as a fashion photographer. It’s just a really great pack all-around for players who are photography enthusiasts, I can’t recommend it enough.
For players who own the Get Famous expansion pack, there are additional stage lights and set pieces you can use for photography as well.
If you own Get To Work, there is an all-in-one photo studio you can use to take really nice shots, too.
Optional Mods to Elevate Your Photography
None of these mods are required to take beautiful photos in The Sims 4. This guide has given you all the tools in both the base game and packs that you need to take amazing photos with no third-party content. However, if you are a PC player who likes to use mods, these can really set your photos apart.
- Andrew’s Pose Player: This mod lets you use an endless number of custom poses in the game so you aren’t limited by the game’s existing pose selection. You will also need the Sim Teleporter and some custom poses to use with the Pose Player.
- Sim Teleporter: This object lets you teleport Sims where you want them easily with no hassle. It’s essential for custom group poses.
- Custom Poses: There a wide number of custom poses available to download. This tumblr directory is a good place to start looking for some.
- TOOL: The TOOL mod is intended for creative building purposes but it’s also a lifesaver for avid storytellers and photographers. Use this mod to move your Sims anywhere in the world for great photos or nudge them back into place without breaking their pose when they don’t pose in the right spot. I could not take pictures of large events without this mod to help keep all those pesky Sims where they’re supposed to be.
- MCCC: I use this mod to swap out outfits easily without having to wait for my Sim to change into them. You can also use the teleport features of this mod to help put Sims in the right position for custom poses.
- Photographic Memory: Holy moly, I love this mod. I love it so much, I wrote a walkthrough for it. You can read it here. This mod adds so many new options for customizing and cataloguing all your precious photos, it’s a total game changer and I can’t sing its praises highly enough. Seriously, go download it right now and never look back.


0 Comments
Be the first to comment.
Welcome to Sims Community!
Our community is about connecting people through open and thoughtful conversations. We want our readers to share their views and exchange ideas in a safe space.
In order to do so, we've created a simple set of rules that will improve your experience. Simply put, keep it civil.
Your post will/might be rejected if it contains:
User accounts will/might be blocked if we notice:
So, how can you be a power user?
Thanks for reading our community guidelines. Please note that we're aware of certain issues with Sign In / Log In and Create Account / Email Confirmation issues. We're working behind-the-scenes on a new Account Creation process. Thank you for your patience and remember - freedom of speech is not freedom of reach