Hey guys!
Today I wanted to talk to you about how I separate mattresses from their frames. I have watched countless videos and read many tutorials but I could not figure out how to do it. Then a dear friend came to my rescue and showed me how she does it. So, I’m dedicating this article to my friend Ami as a thank you for her help.
Tools needed:
- Sims 4 Studio
- Blender
- Graphic Program
- Annachibi’s separated frames
Before we get started, I want to make something very clear. If you release these items using this tutorial and Annachibi’s bed frames then you must provide her credit. Do not release separated beds that use her frames as a base without giving her credit.
Step 1
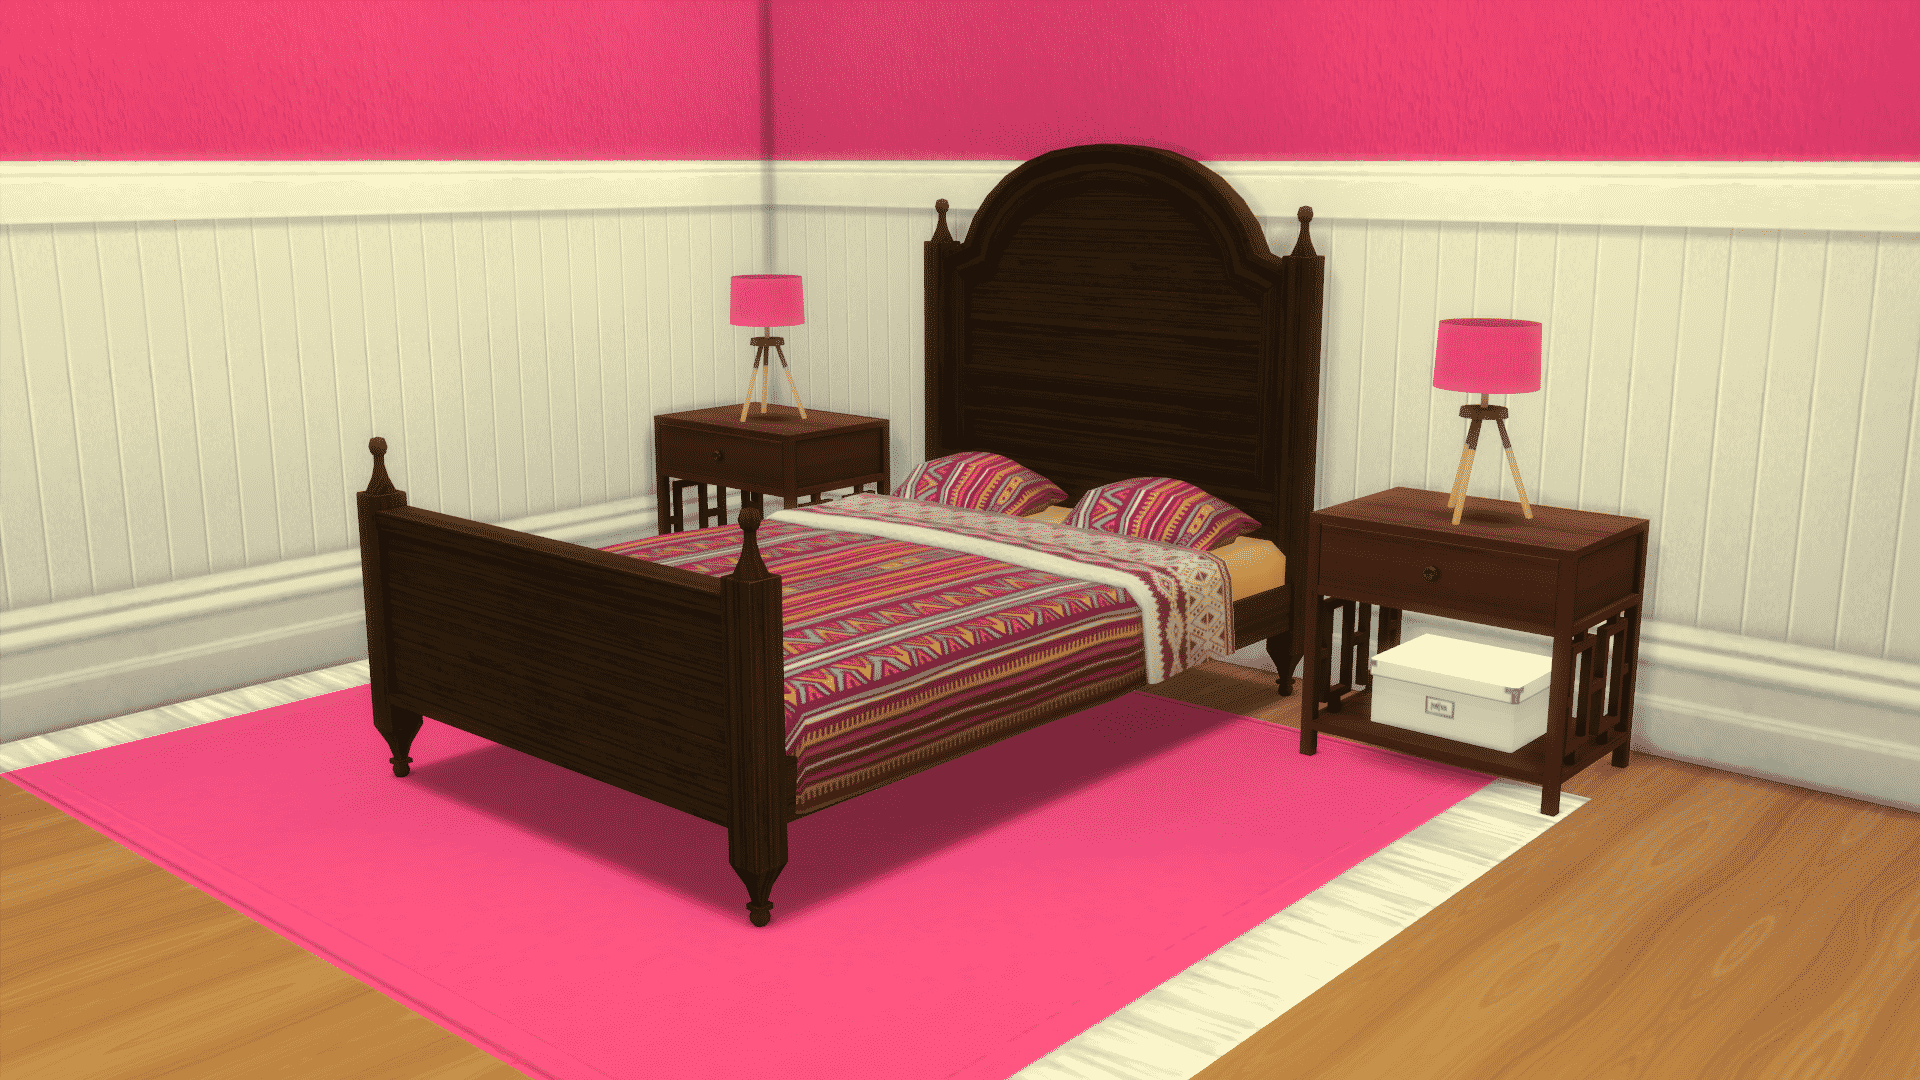
Organize! You guys should know by now how big I am on keeping everything nice and neat. Make yourself a folder called “Working CC”. Then inside that folder you will keep all your goodies. I suggest making a folder called “Bed Frames” and then in there you will have a folder with all of Annachibi’s frames. You will also create folders for every bed you separate. For this tutorial, I’m going to show you how to separate the Sims 3 Cape Cod Double Bed that I converted and now need to separate. Because they are both packages, I made sure to put the Sims 3 bed package in it’s own folder so I wouldn’t get confused.
Step 2
Place the package of the bed you want to separate and all of Annachibi’s frames into the mods folder found inside the Sims 4 Studio folder. C:Users****DocumentsSims 4 StudioMods it should be in that folder. Open Sims 4 Studio (S4S) and then select “create 3D mesh” found under the objects button. Click load and let it do it’s thing. Once it is done, then you will type in the name of the package you want to separate. Usually, you can just type in the first few letters and it will find it. I did a search for Cape and found my bed.

Step 3
Once you have found the bed you will export the mesh and the texture. Put them into your folder that you made for this project and label them something that makes sense. It’s important to label everything right so you don’t get mixed up.
Step 4
Now you will open this bed in blender and export it as an object. Remember, this is the package of the bed you are wanting to separate.

Step 5
Go back to S4S and once again select “create 3D mesh” but this time you will be opening up Annachibi’s frame. Type in her name in the search bar and select a bed that looks like the one you are wanting to separate. Export the mesh and remember to name it something that makes sense.

Step 6
Go back to Blender and open Annachibi’s frame mesh. Import the .obj mesh of the bed you are wanting to separate so it is on top of Annachibi’s frame. You will see the frame like in the 3rd image below. The fifth image shows how the frame looks with the mesh of the one you are wanting to separate on top of it.


Step 7
To navigate with Blender, press down the middle roll wheel on your mouse to scroll around. You hold down the right button to highlight something (it will have an orange outline).
Write down the cut number of Annachibi’s frame (it should be 0) and then select it so you can delete it. You will be left with a white blob. Next you have to delete the mattress, pillows and sheets so you are left with just the frame. You do that by right clicking on each item to highlight in orange and then pushing your delete button. After you are done with that, you will delete the shadow of the bed you are using for your base. First, right down the cut number (it should be 1) and type that into the shadow cut number of your bed that you are separating. Finally, you will right click on the leg shadows (the small circular shadows) and then select scale so you can make them really small and hide them under the bed.
Screens to explain this process:


Step 8
Once you are done with all that, save your mesh. You do that by click “save as” and then naming it whatever and then select “save as blender file” in the upper right corner area.

Step 9
Go back to S4S and create yet another package. This will be your final one so label it something that makes sense. Import the mesh you just made in blender into the LOD High under the mesh tab. It’s going to look really crazy because of the LOD but you’ll fix that next. After you have imported the mesh, it will look like the below and that will tell you did it right. BE SURE to click on every LOD! Otherwise when you zoom out, it will morph into something ugly. You can also go in and fix the bumps and shininess at this point by changing them in the warehouse tab (that is another tutorial).


Step 10
Now you will fix the shadows by going back to Blender. Right click on the big shadow box (cut number 1) and delete it. Select save as and name it whatever (I usually name it something like CapeCodBedShadow). Then you will go back to S4S and import this into as shadows for your bed frame. Remember to do this for every Shadow LOD. You will know you did this right because it will look like the below:


Step 11
Import the texture you exported of the bed you wanted to separate. Then save it and test it in your game. If all went right, then you should be able to place it and put a mattress on top.


Congratulations! You just separated your first bed frame. I choose to leave my items at high LOD counts. There are tutorials out there showing you how to lower these for the medium and lower LODs. If you have any questions, please reach out to me at the Sims Community and I’ll be happy to try and help.
Download the bed frame I converted and used for this tutorial:

Terms:
Recolors are allowed. Please tag me because I’d love to see what you did.
-Don’t use my swatches and claim as your own.
-Don’t reload my items to a paysite.
-Don’t remove my credit from the description.
-Link back to me here if you recolor as the person who converted them.
-Link back to me here if you include them in your build package.
Download (click the words)


1 Comment
I can not delete the mattress or pillows or quilt, if I try it just deletes the whole thing
Welcome to Sims Community!
Our community is about connecting people through open and thoughtful conversations. We want our readers to share their views and exchange ideas in a safe space.
In order to do so, we've created a simple set of rules that will improve your experience. Simply put, keep it civil.
Your post will/might be rejected if it contains:
User accounts will/might be blocked if we notice:
So, how can you be a power user?
Thanks for reading our community guidelines. Please note that we're aware of certain issues with Sign In / Log In and Create Account / Email Confirmation issues. We're working behind-the-scenes on a new Account Creation process. Thank you for your patience and remember - freedom of speech is not freedom of reach