

How to Use Sims 2 Portals for More Fun and Immersion in Your Game!
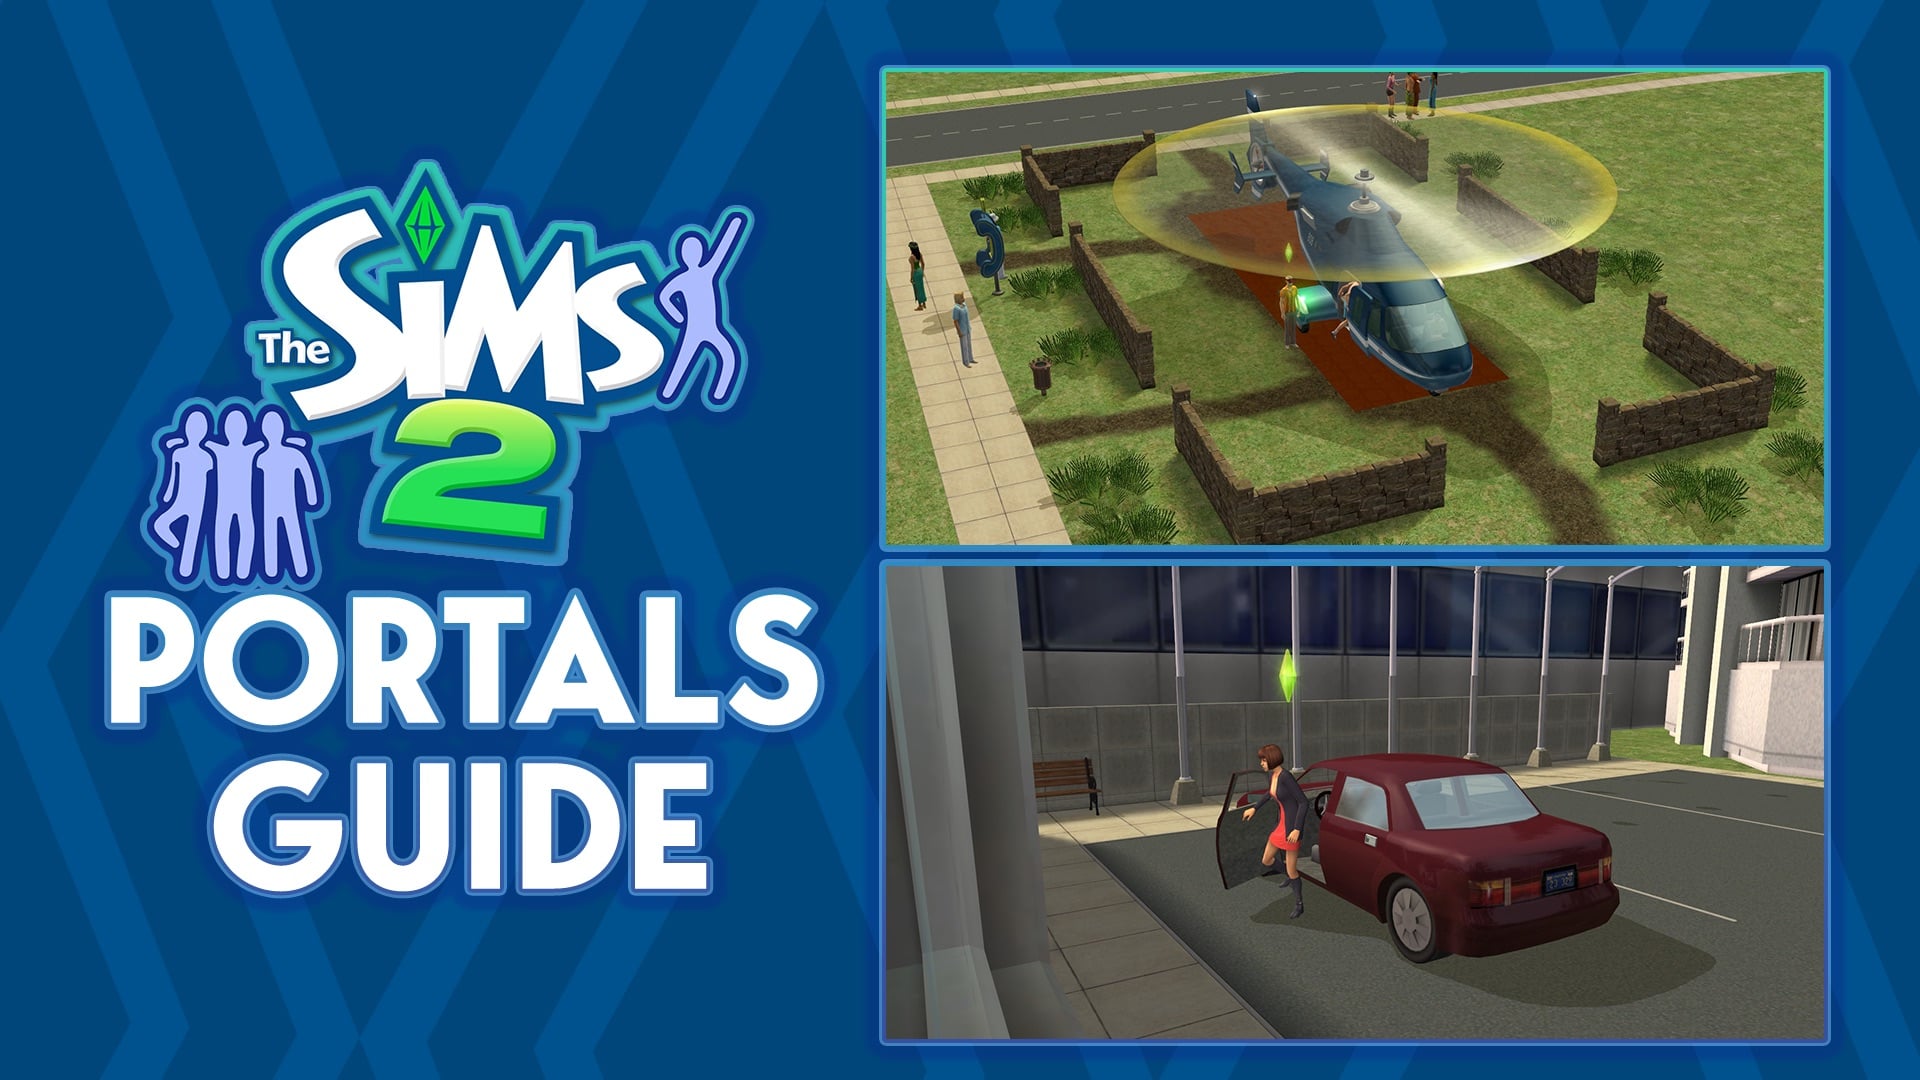
Ever wondered how to build a plaza with multiple entry points besides the ones on the front street? Or would it be possible to make functional parking lots without requiring any mods? You’re in luck! With this guide, we’ll take a look at what The Sims 2 portals are and how you can use them to make the lots more immersive with examples.
Table of Contents
What are the portals and how to move them?
Portals are technical objects that exist in both The Sims 1 and The Sims 2 as both of these games have a closed world. These are invisible objects automatically generated when a new lot is created. The Sims 1 has 2 types of portals while The Sims 2 has 6 types. However, due to The Sims 2 allowing cloning objects, we’ll focus on The Sims 2. In The Sims 1 however, it is much easier to grab them and move them around with move_objects on cheat.
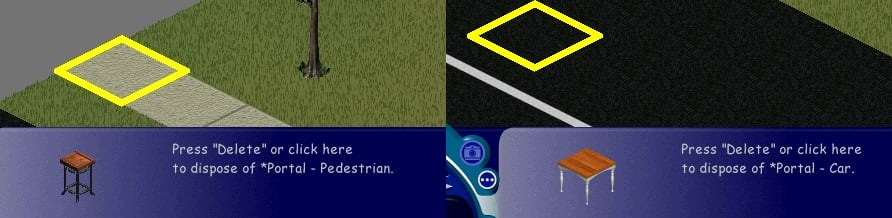
In The Sims 2, in order to pick up portals, moveObjects on cheat needs to be entered. This is required for both portals on-lot and on the street. Portals can be easily cloned by placing one down while holding the Shift key. While Portals can be deleted, it is recommended to keep at least 1 non-beach portal on the lot.
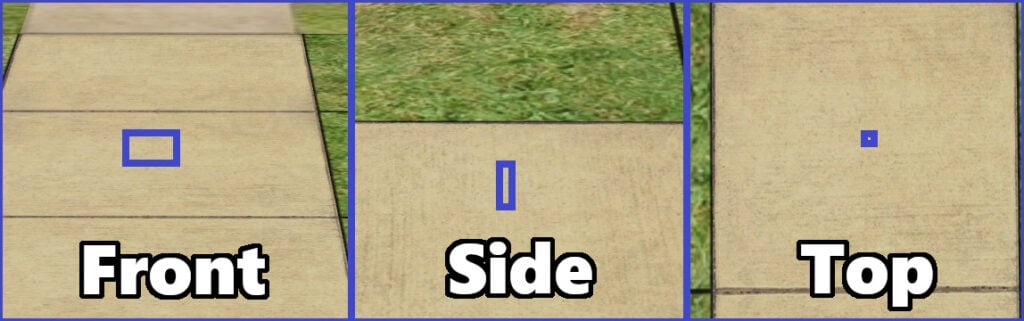
Grabbing the portals can be a bit tricky though. The portals have a tiny hitbox to grab from, which is larger when rotating the camera to the portal’s rotation. If you have trouble locating the portal after moving it, you can try building a fence or wall where you suspect where it might be as the game won’t allow building there.
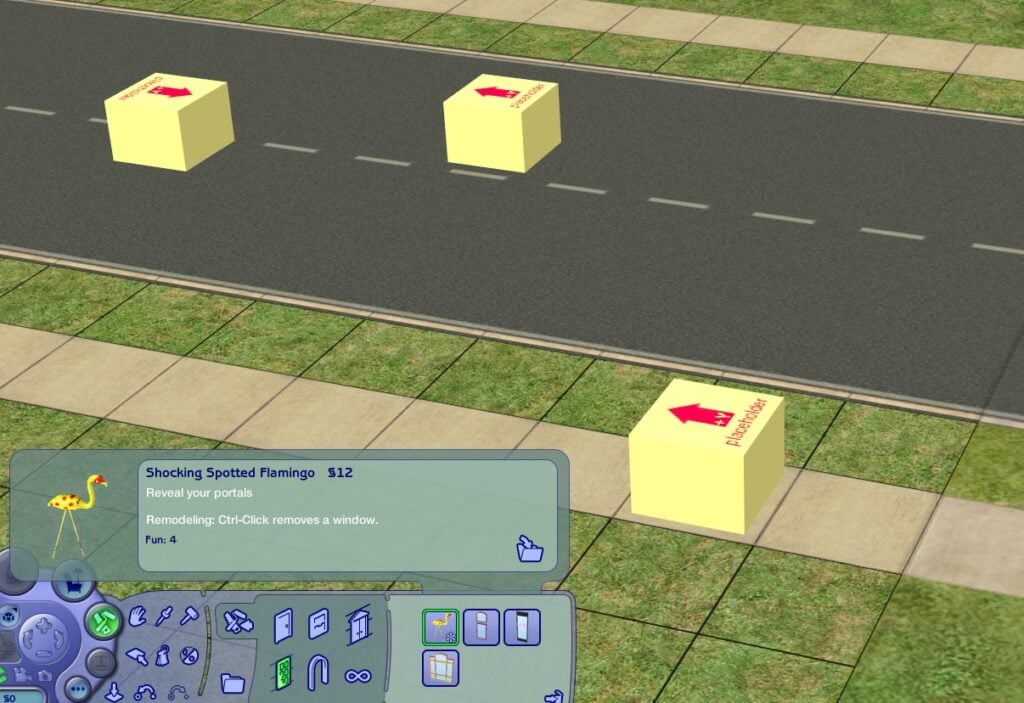
There are mods that make the locating and grabbing process much easier. One of them is Portal Revealer by Inge Jones available on Mod The Sims. This will add a Portal Revealer flamingo in the Double Window category. Placing it down on the lot will reveal all the portals on the lot as Placeholder boxes. After moving them around, simply deleting the flamingo will hide them again. Removing the mod afterwards will keep the portals in place you’ve put them.
Now that we have gone through the basics, let’s go through each portal in the game! In the pictures, portals will be represented with a rug to illustrate the placement (with an arrow drawn on it if necessary). In gameplay, do not put rugs on the portals as it will cause things appear next to it instead. The general rule is that if something other than portal also takes the square (stair landing, elevator's front side etc), it'll spawn the Sims/cars next to it.
Pedestrian Portals
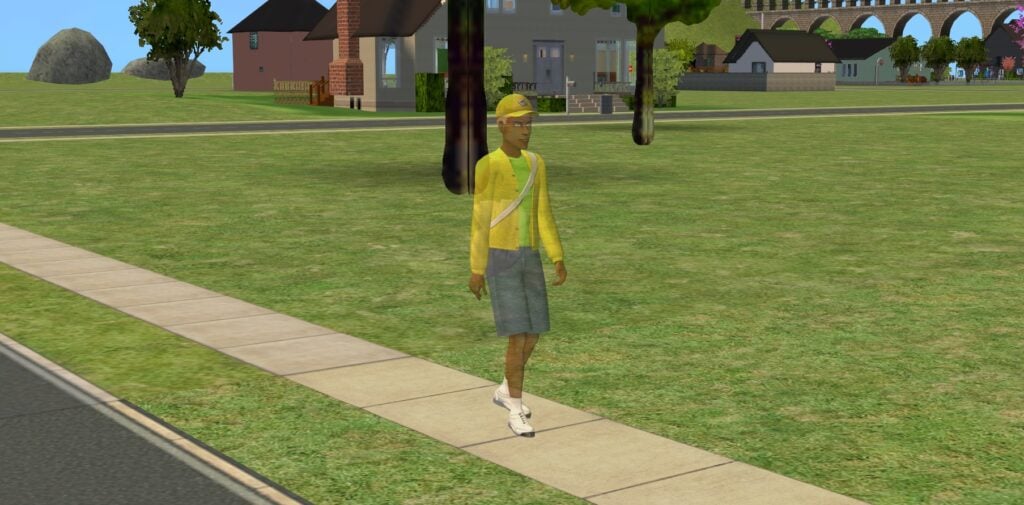
Pedestrian Portals are the place where walking sims and pets arrive into the lot and leave from the lot. Whenever a sim arrives, they choose a random portal to appear on. Upon leaving, sims will choose the portal closest to them. If the portal is blocked by items or another sim, it’ll spawn a sim on a tile next to it. The rotation of the portal affects the rotation of the sim arriving on the lot.
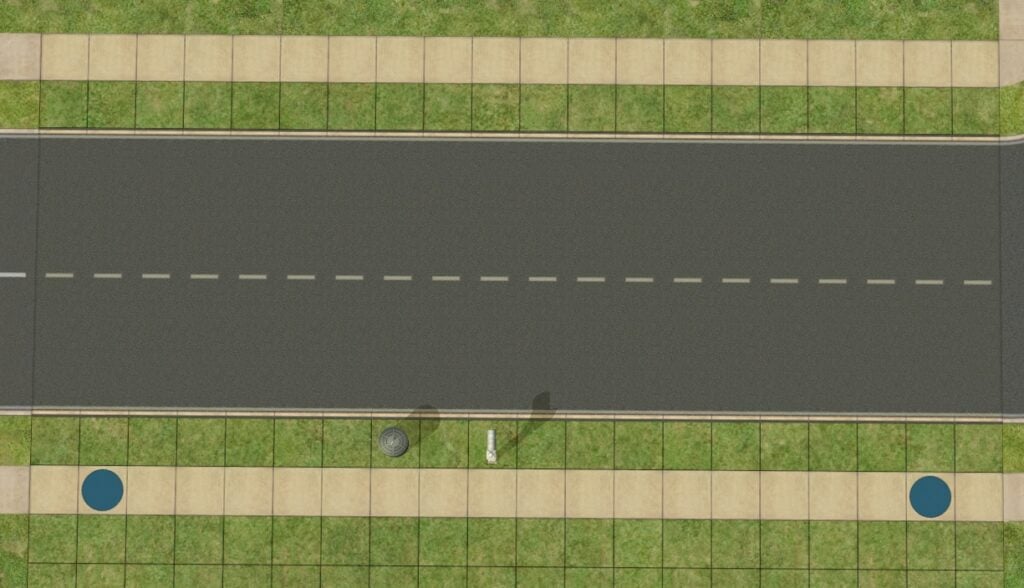
Every lot has 2 of these portals, located on the lot-side sidewalk one square away from the lot’s edge.
With these, it should be mentioned that Mailboxes and Telephone booths are also portals. For example, if a sim walks by your house, they will first navigate to your mailbox, stand there, and then make their way to a Pedestrian Portal. It also acts as a spawn point for some situations, for example, when Sims move into the lot or a witch is flying to/from another lot. If a sim in the household is deleted on a lot due to moveObjects cheat, an error through testingCheats, or by being taken off-lot due to a glitch, upon saving and returning to the lot, they can be found next to the mailbox (can be used to reset a glitchy/stuck Sim, but don't try this on Community lots).
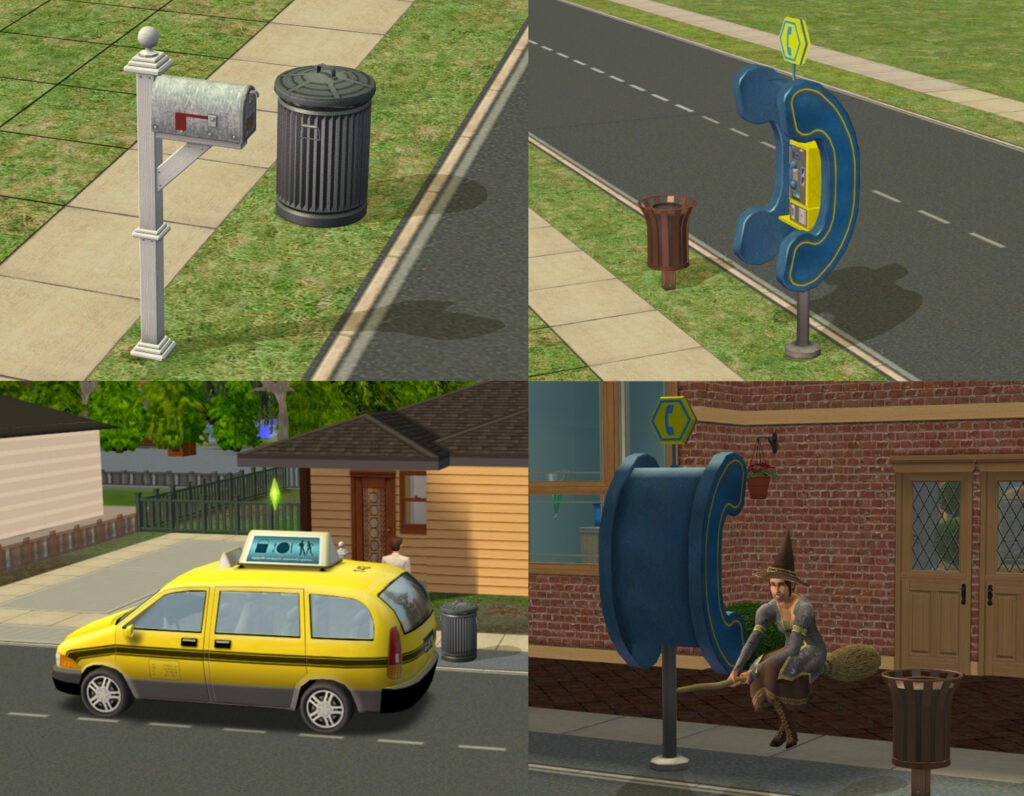
Sims moved in spawn in near mailbox. Moving the mailbox will affect the location of the move-in cutscene.
Let’s move to the examples of how to use them!
As mentioned before, if we have a park or a plaza that looks like it has multiple paths leading in, Sims still enter only from the one side. However, by simply cloning those Pedestrian Portals and putting them in other entryways, Sims have multiple points to walk into and out from the plaza/park, helping to make the lot even more immersive.
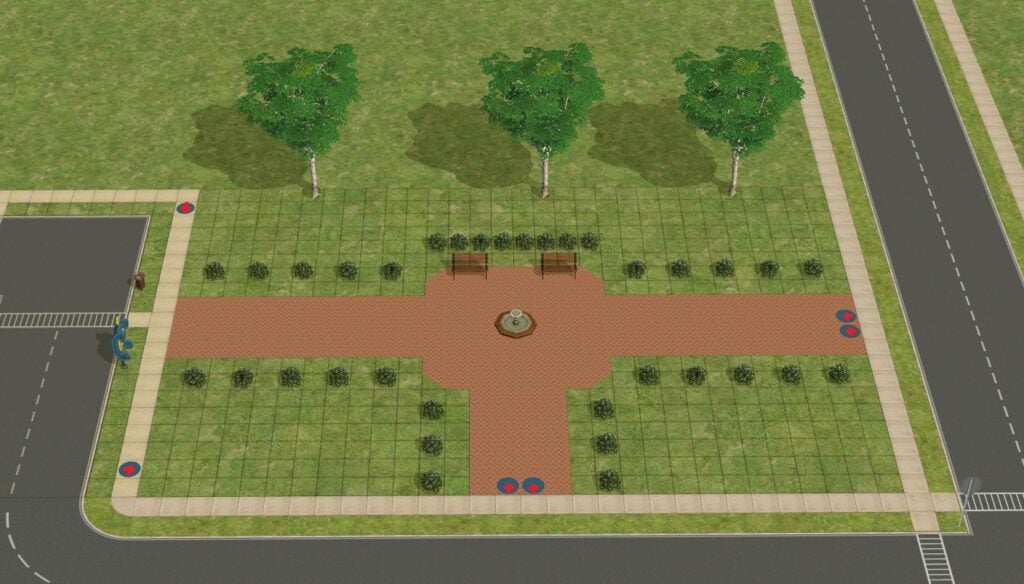
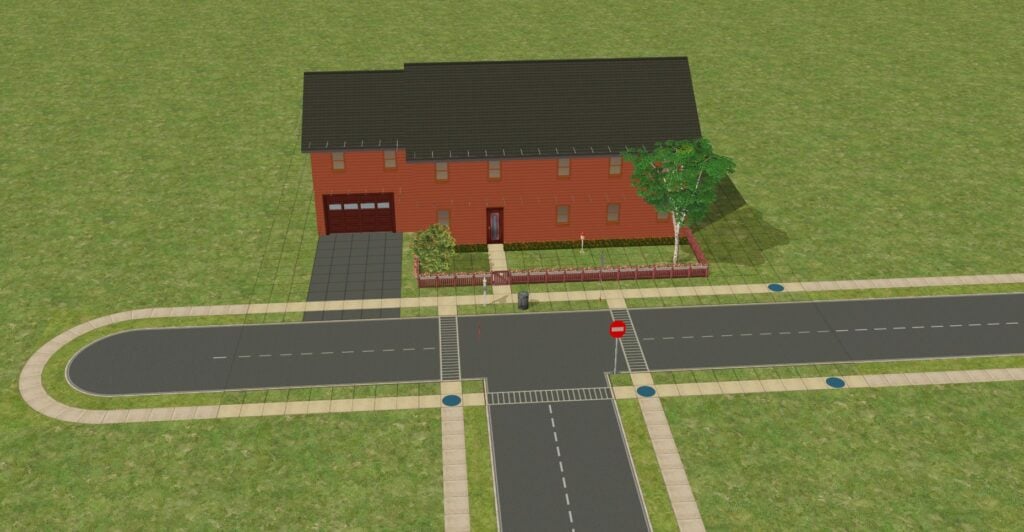
Or sometimes, due to the placement of the lot, it makes more sense to include more or less Pedestrian Portals. For example, if the lot is placed on a T-intersection, it would make sense for Sims to enter the lot from the front, crossing the street. Or if it’s placed on a dead-end, it wouldn’t make sense for Sims to walk off from the dead-end side.
For more creative applications, try including those in subway stations or bus stops. While you won’t see the transport picking your Sim up, it’ll definitely help towards the big-city atmosphere. Bonus points if you have CC to use there. If you use stairs, be sure to leave some breathing room by moving the portal one square away from the stair landing.
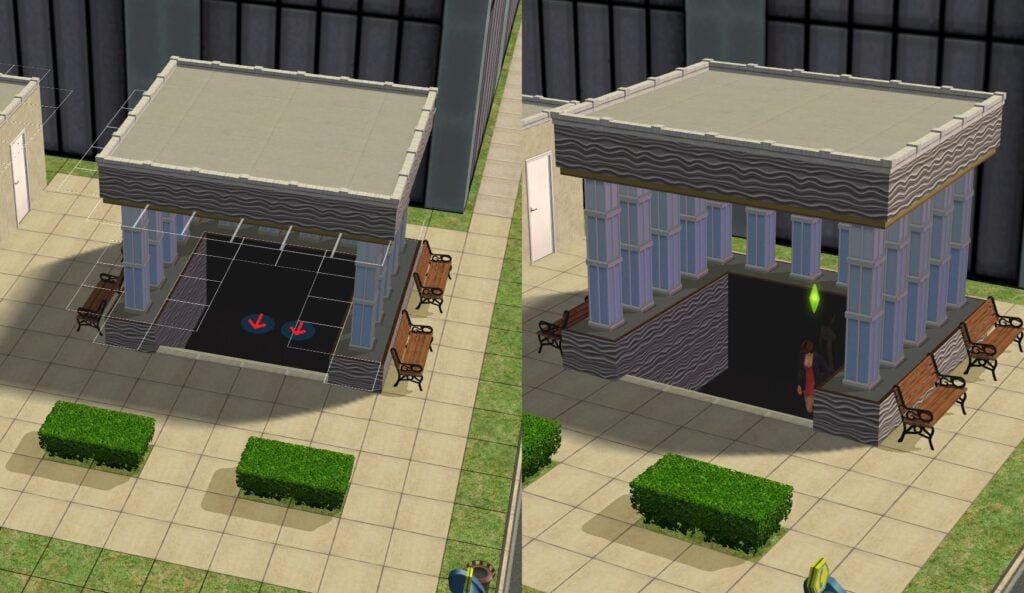
Note. Due to the fencing on the platform, the roof will be invisible in the Neighborhood View.
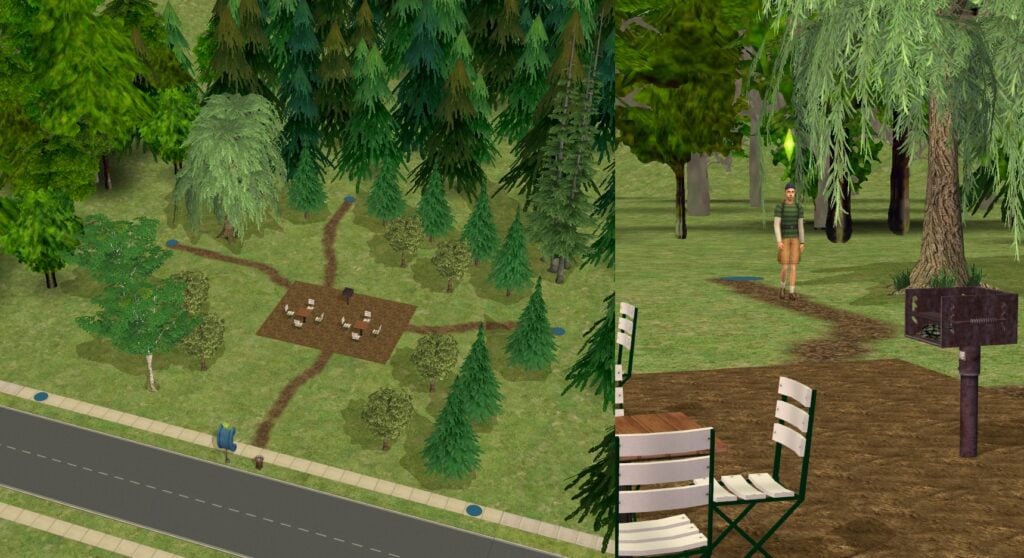
Or let’s say you are making a forested lot. You could make additional entry paths there to make it seem like sims are making it on the lot during their hikes. When you send your sims there by walking, it will be interesting the see where they will emerge from.
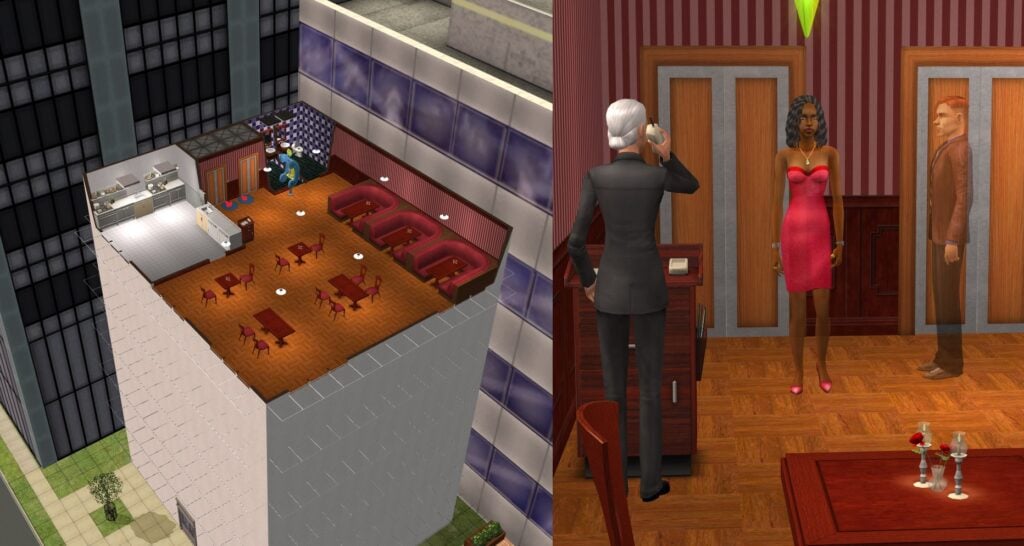
Finally, these can be used to make the games easier or faster by including these portals indoors. For example, creating a shell building where only one floor matters, so Sims just appear or disappear from the front of the elevator. This will, however, make skipping out on bills in restaurants much easier…
Car Portals
Besides Sims, cars also require portals in order for the roads to function. However, there are 4 separate portals for cars:
- Car Start - Where carpool cars/buses, taxis, and owned cars spawn. If there’s already something on the spot, it’ll spawn in front of it.
- Car Stop - The point where the carpool car or taxi stops. If your sim carpools with a helicopter, it’ll land on that spot instead. If there’s already something in front of it, it’ll stop behind it.
- Car Service Start - Where Service NPC cars appear. Same rules from the Car Start portals apply here.
- Car Service Stop - Where Service NPC cars stop. Same rules from the Car Stop portals apply here.
The usual layout for these portals is that the lot-side road is reserved for Car portals (carpool, taxis etc ) and the other side is reserved for Car Service portals. While all of these portals are found in the center of the road, the start portals can be found on the edge of the lot while the stop portals can be found some squares after the default trashcan and mailbox/phone booth locations.
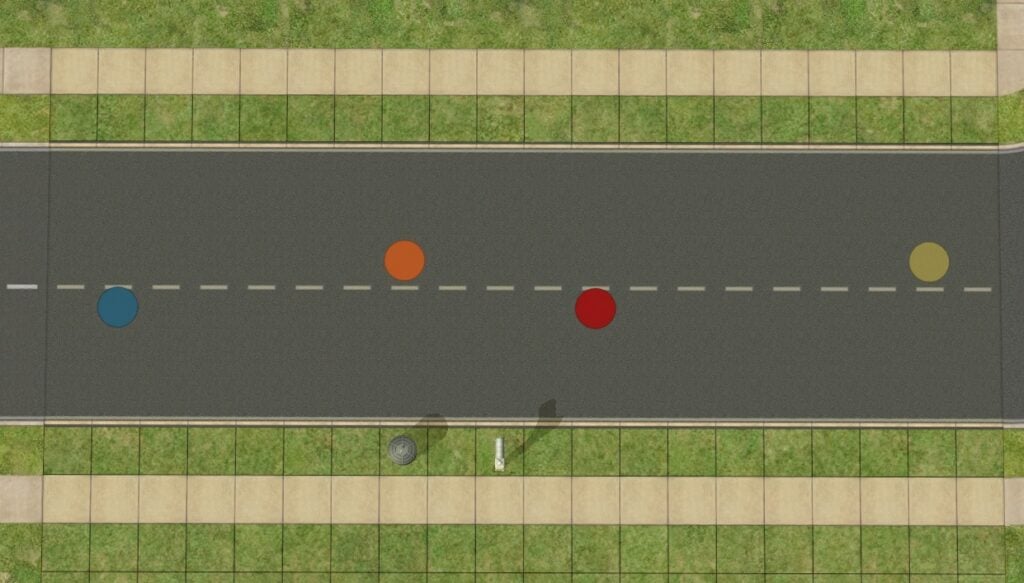
When a car is spawned in, it randomly chooses a Start portal and drives forward until either it touches a Stop portal or something is in its way. When a car drives away, it’ll drive forward until it encounters an obstacle (which usually is the lot’s edge), at which point it disappears.
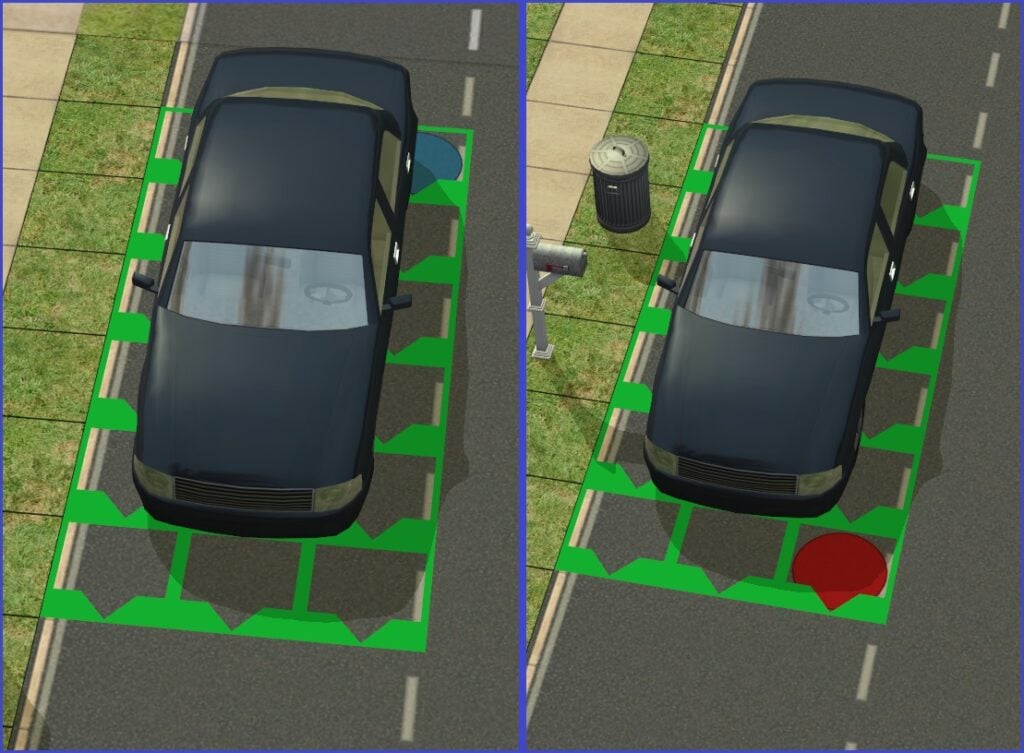
Whenever moving the Start portal around, make sure that it has room to drive forward. Usually, 17 squares is enough for all ownable cars. Otherwise a visual glitch will occur where the car is spawned somewhat ahead of the portal, but the sim will enter and exit the car as if it is on the portal.
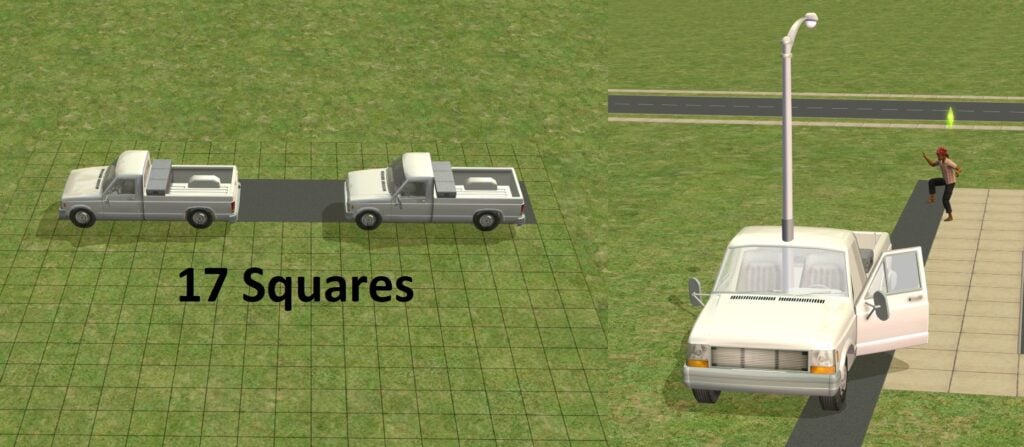
Car featured: The Smord P328
But let’s get to examples on what can be done by moving these.
With boolProp carsOnRight false cheat, you can have the cars drive on the left side in the neighborhood view. This will not reflect on lots however. To achieve this, you can move the portals around. Make sure that these portals are located on the sides rather than on the lines. The car drivers will be on the right side still. If you are using driveways, it's best to use driveway extensions to simply have the car disappear and reappear on the spot. Using the usual driveway will have your car drive away on the right side, return on the left side and suddenly turn around to enter the driveway.
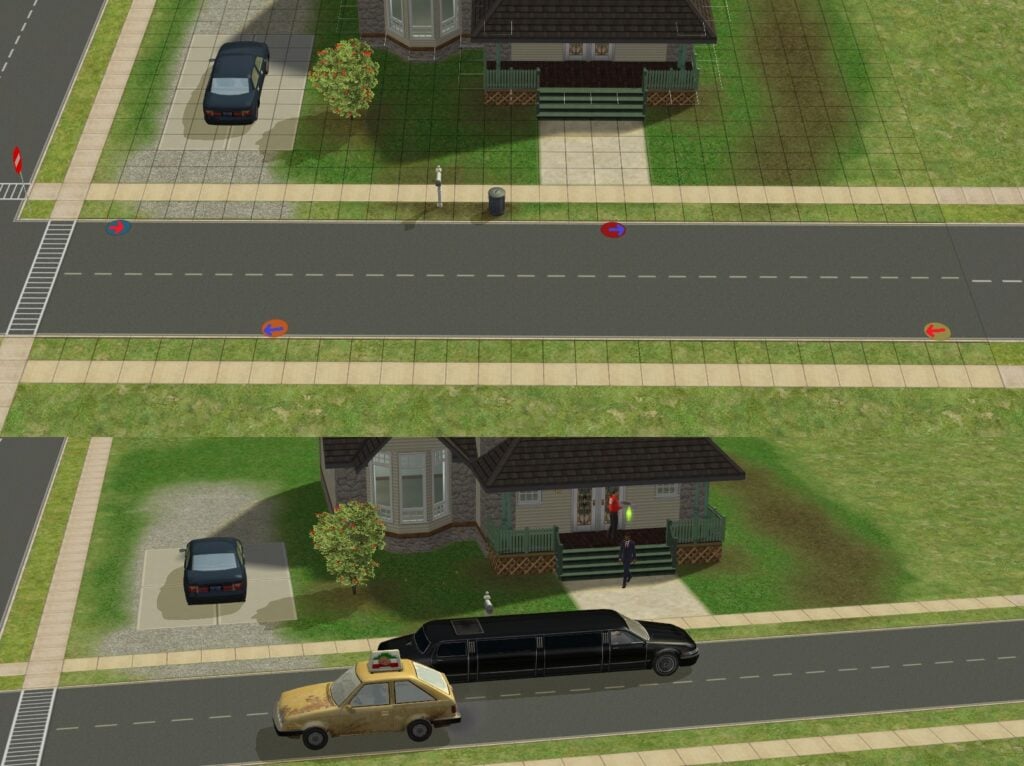
Pre-made lot used: Minor Manor - 3BR 2.5BA (Teen Style Stuff)
Or sometimes it makes more sense for the car to stop at a different place. Especially when your main building is taken by one side while the other side is dedicated to a park.
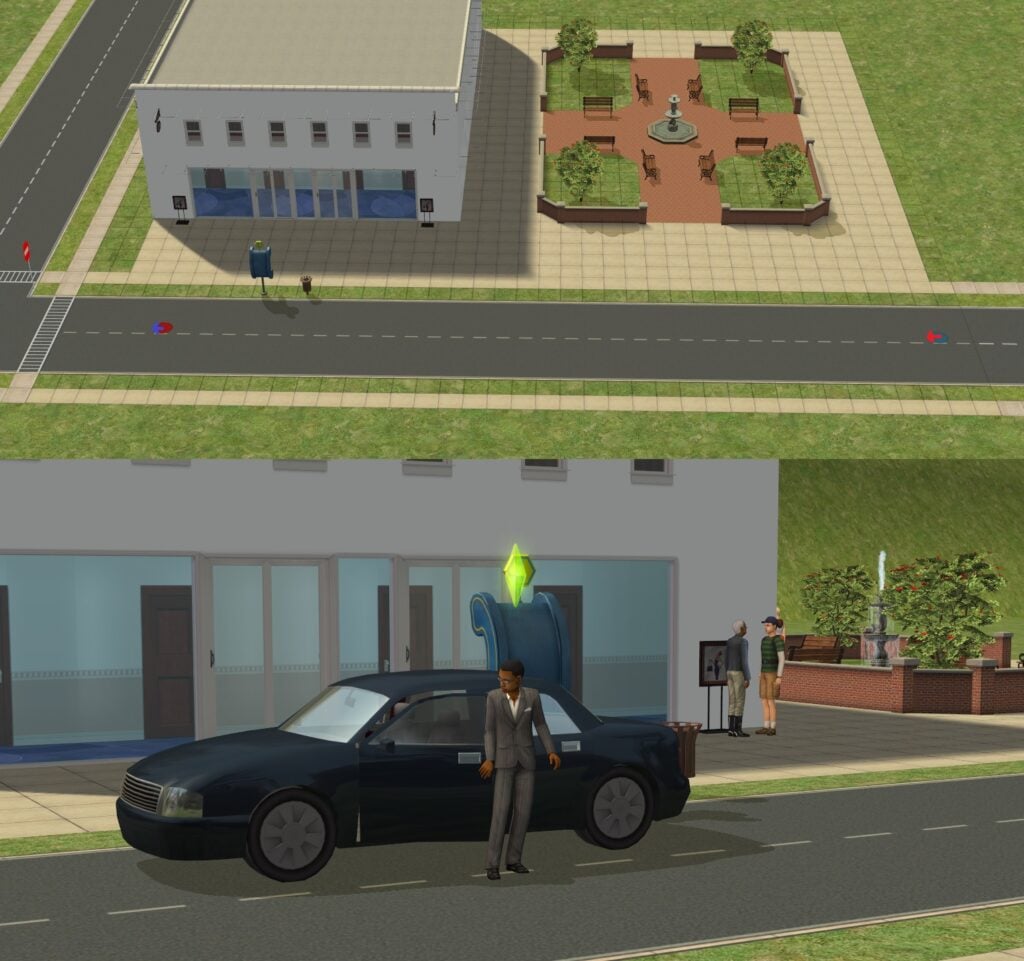
Creative applications include making functional parking lots. The parking lot must be at least 17x5 squares. You need an object to stop the car at the lines, be it a streetlight, a Stop Portal (though we wouldn't recommend using a Stop Portal due to helicopters using it), or even building a step-over fence. While the car will just appear and drive into the spot and disappear on the spot afterwards in the parking space, it at least takes the car off the street it would be on otherwise.
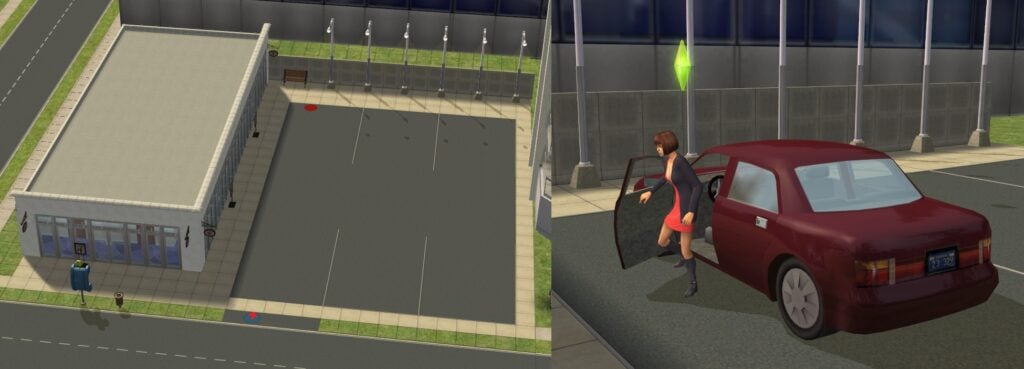
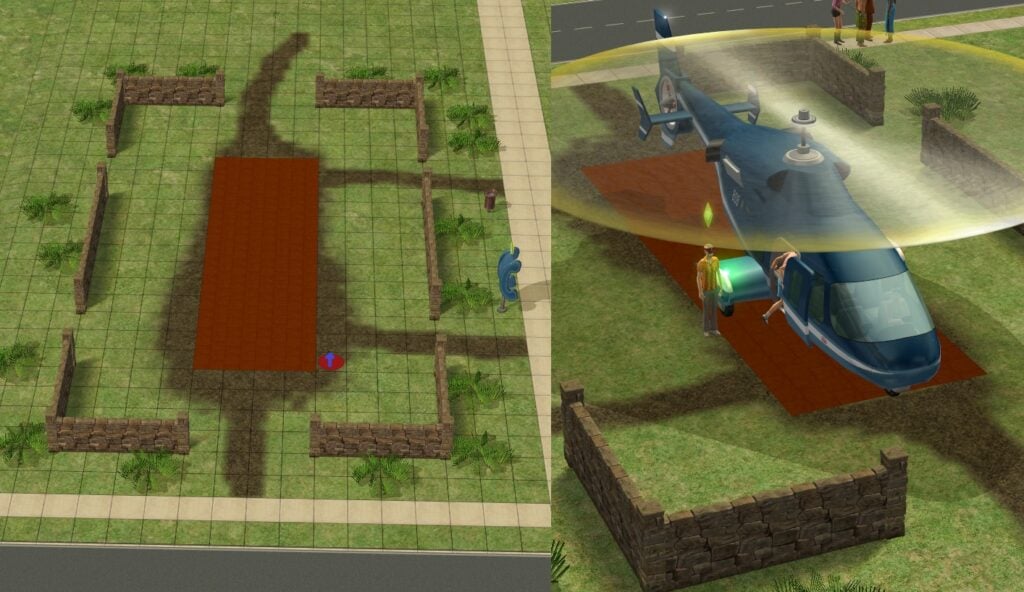
Then there's the helicopter carpool. These will spawn to the left of Car Stop Portal, moving it will also move the area a helicopter spawns in, as long as there's a 14x4 area for it to fit in. The rotation of the Stop Portal affects the rotation of the helicopter. Be mindful that it could cause your Sims' cars and taxis drive to the edge of lot. Having multiple Stop Portals would solve it, but it'll give the helicopter 50/50 chance to land on the landing spot. Or on Island destinations, some tours Sims can go on have a helicopter come to pick your Sims up. If your Sim owns a helicopter, this is where they'll park it once they arrive.
Beach Portals
Bon Voyage introduces a new type of lot: beach lot. The main feature of the lot is that there is an ocean area where Sims can swim in. This introduces two new portal types:
- Beach Portal - These act as entryways for Sims to enter and exit the ocean.
- Effect holder - beach waves - Responsible for creating the wave effect.
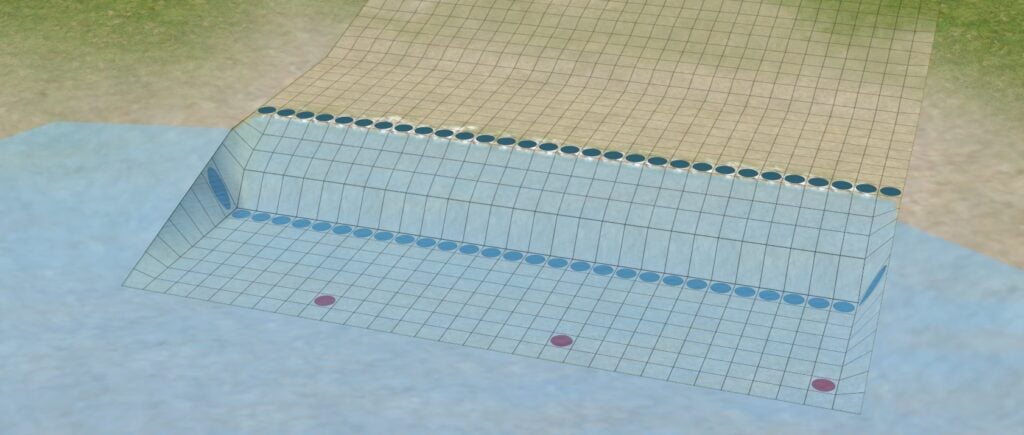
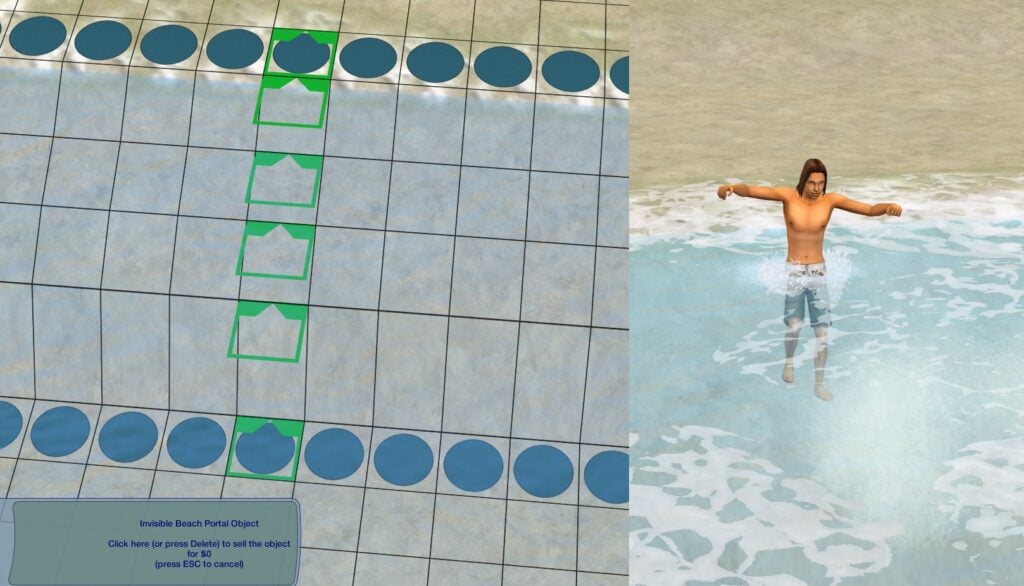
Beach Portals are located on the shore, one for each square (totaling to lot width). These are easy to grab and take 6 squares. These must be rotated towards the ocean in order for them to work.
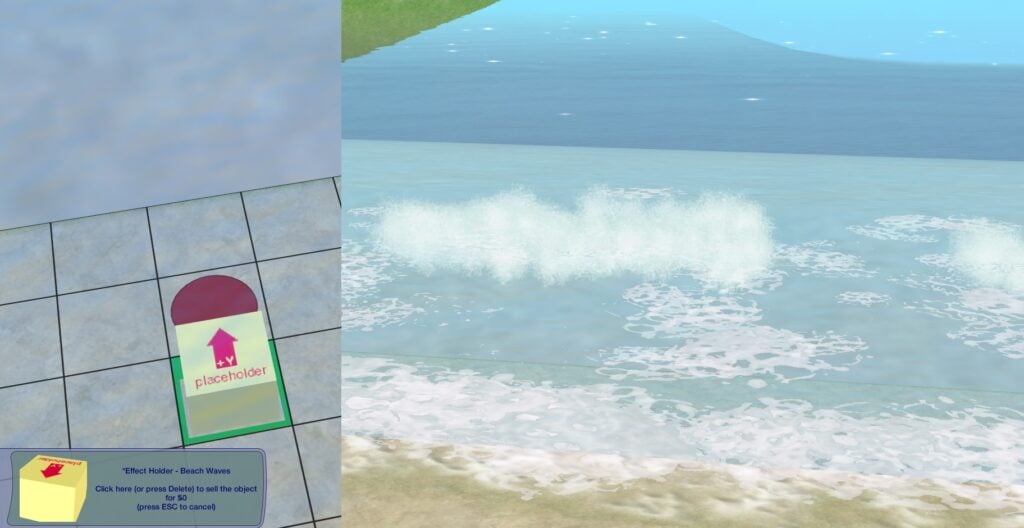
Beach wave effects, however, are near impossible to grab without mods. These are located on the edge of the lot in the ocean and take only 1 square. These must be rotated towards the shore to make the wave effects look natural.
Not a lot to keep in mind, yet these can be changed around for these examples.
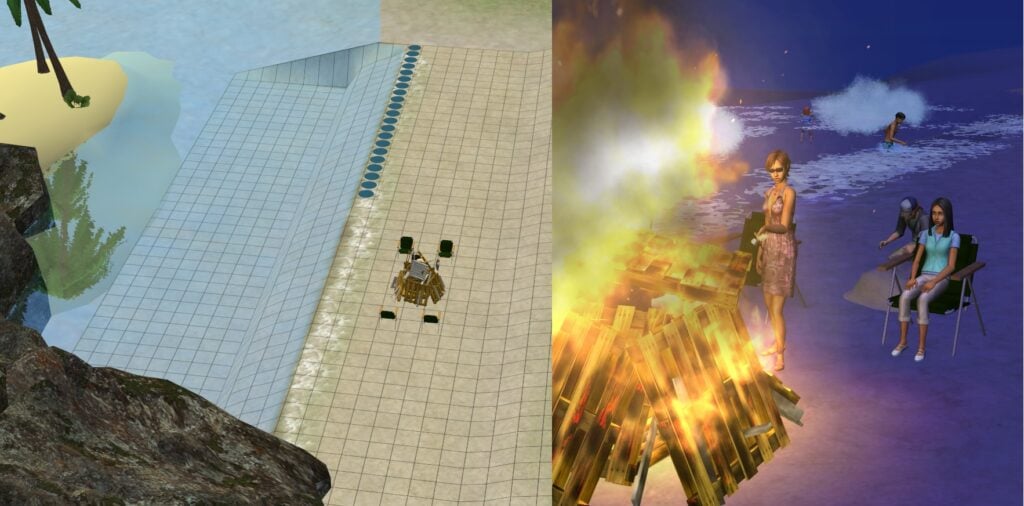
You can delete excess Beach Portals to limit the areas from where sims can enter and exit the ocean. For example, have a beach grill area from where Sims won’t get into the ocean or add an obstacle to the shore. Do keep in mind that if you delete all Beach Portals, there is no way for Sims to go swimming in the ocean. Beach activities will still be possible though.
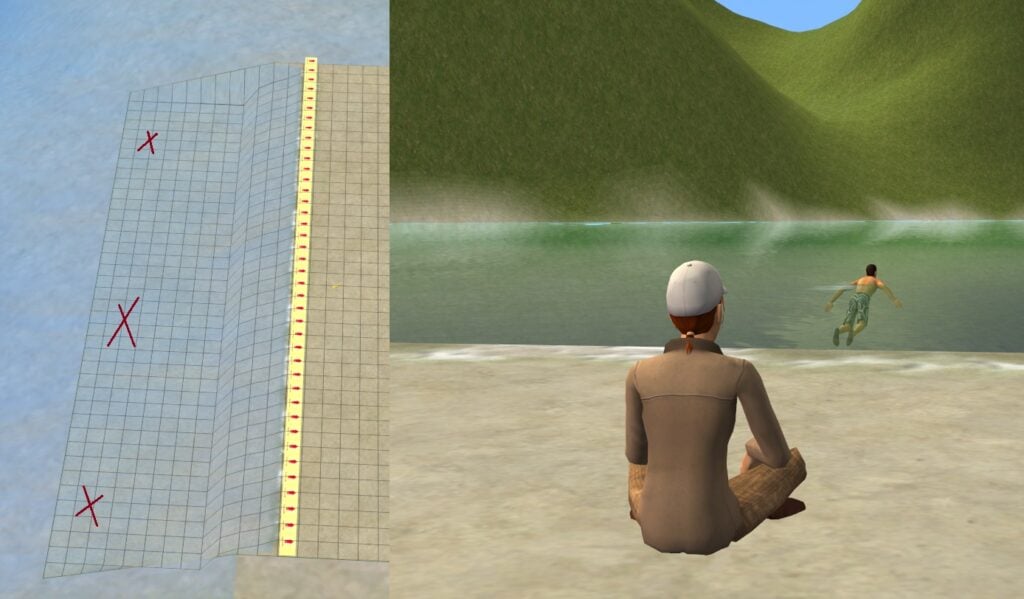
Sometimes for the neighborhood terrain context, it would not make sense to have such waves as the beach lots usually have. For that, you can simply remove the Beach Wave Effect Holders. It is not possible to remove beach activities from beach lots, but it’ll help towards immersion for lakeside lots.
Conclusion
Invisible, yet required for lots to function, Sims 2 Portals give points for Sims and vehicles to enter and exit the lot. However, with this knowledge, one can use it to make the lot more immersive, making it fit better with the neighborhood that can be seen in the background. Or it could be used to make the gameplay more whacky!
So, what do you think about portals? What lots you’ve built could benefit from that? Any ideas to share on how to use them? Share them in the comments below, and make sure to check out our other Sims 2 guides & articles on The Sims Community!

0 Comments
Be the first to comment.
Welcome to Sims Community!
Our community is about connecting people through open and thoughtful conversations. We want our readers to share their views and exchange ideas in a safe space.
In order to do so, we've created a simple set of rules that will improve your experience. Simply put, keep it civil.
Your post will/might be rejected if it contains:
User accounts will/might be blocked if we notice:
So, how can you be a power user?
Thanks for reading our community guidelines. Please note that we're aware of certain issues with Sign In / Log In and Create Account / Email Confirmation issues. We're working behind-the-scenes on a new Account Creation process. Thank you for your patience and remember - freedom of speech is not freedom of reach